
APTORA provides a Student Attendance Module to manage student attendance timings. Using the Create Attendance Level option, institutions can configure attendance periods by entering the attendance description, start time, warning time, and end time. This guide explains how to create a new Attendance Level and edit an existing Attendance Level in APTORA.
Open the APTORA website and log in using your registered credentials. After successful login, the Dashboard will be displayed.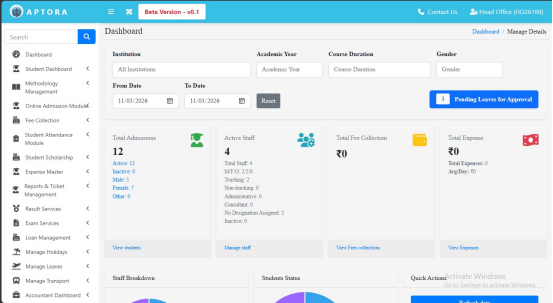
From the left-side menu, click on Student Attendance Module to expand the available options.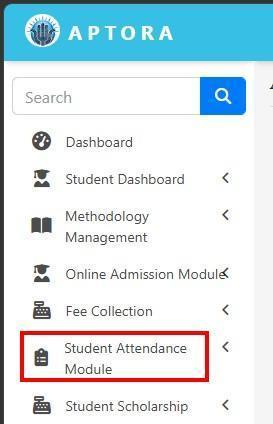
Under the Student Attendance Module, click on Create Attendance Level. The Attendance Level Entry page will be displayed.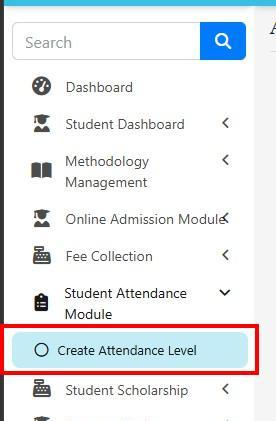
Fill in the required details in the Attendance Level Entry form:
Attendance Level Description: Enter the attendance period name.
Start Time: Select the starting time of the attendance period.
Warning Time: Select the warning time.
End Time: Select the ending time of the attendance period.
Status: Select Active or Inactive.
After entering all the details, click on the Submit button to save the Attendance Level.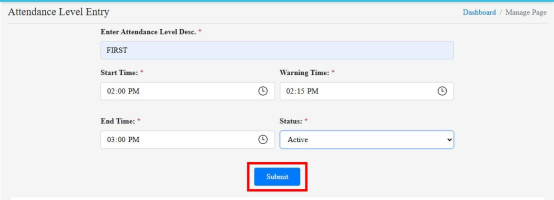
After submitting the details, the Attendance Level List will be displayed.
Here, you can view the created Attendance Level along with its ID, description, start time, warning time, end time, and status.
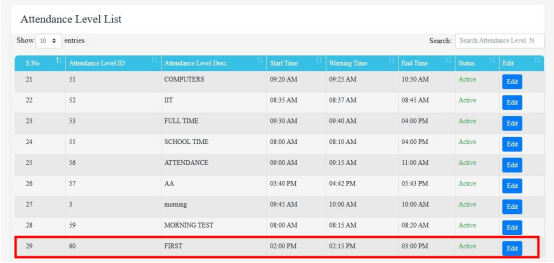
To modify an existing Attendance Level, go to the Attendance Level List and click on the Edit button corresponding to the required entry.
The Edit Attendance Level page will be displayed with the existing details.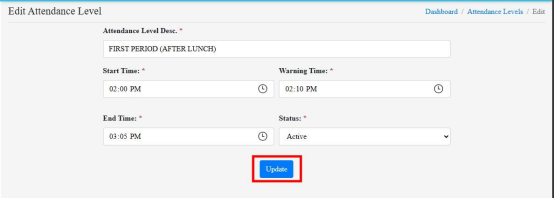
Modify the required details, such as Attendance Level Description, Start Time, Warning Time, End Time, and Status. After making the necessary changes, click on the Update button to save the updated information.
The modified details will be updated in the Attendance Level List.
By following the above steps, institutions can easily create and edit Attendance Levels in APTORA. Administrators can configure attendance descriptions, timings, and status according to their institutional requirements. This helps maintain proper attendance period settings and supports smooth attendance management.